Hot Tub Chemicals: The Correct Order to Add Them
Adding chemicals to a hot tub isn’t just about what you add — it’s about when. Put shock in before you’ve balanced pH and you’ll waste half the oxidizer. Add calcium hardness on top of alkalinity increaser and you risk white scale forming on your shell. The correct sequence protects both your water and your investment.
Why Order Matters
Chemicals interact. Chlorine’s effectiveness is almost entirely pH-dependent — at pH 8.0, roughly 3% of free chlorine is in its active (hypochlorous acid) form. At pH 7.2, that number jumps above 60%. If you dose sanitizer before correcting pH, you’re working against yourself.
Some chemicals also compete for dissolved minerals. Calcium hardness and alkalinity adjusters, added simultaneously, can combine and precipitate out of solution as calcium carbonate — the white chalky deposits you’ll find on jets and waterlines. Sequencing them with time in between prevents that.
Aeration matters too. Hot tubs recirculate water aggressively, which accelerates chemical distribution but also raises pH over time through CO₂ off-gassing. Always run the jets when adding chemicals unless the label says otherwise.
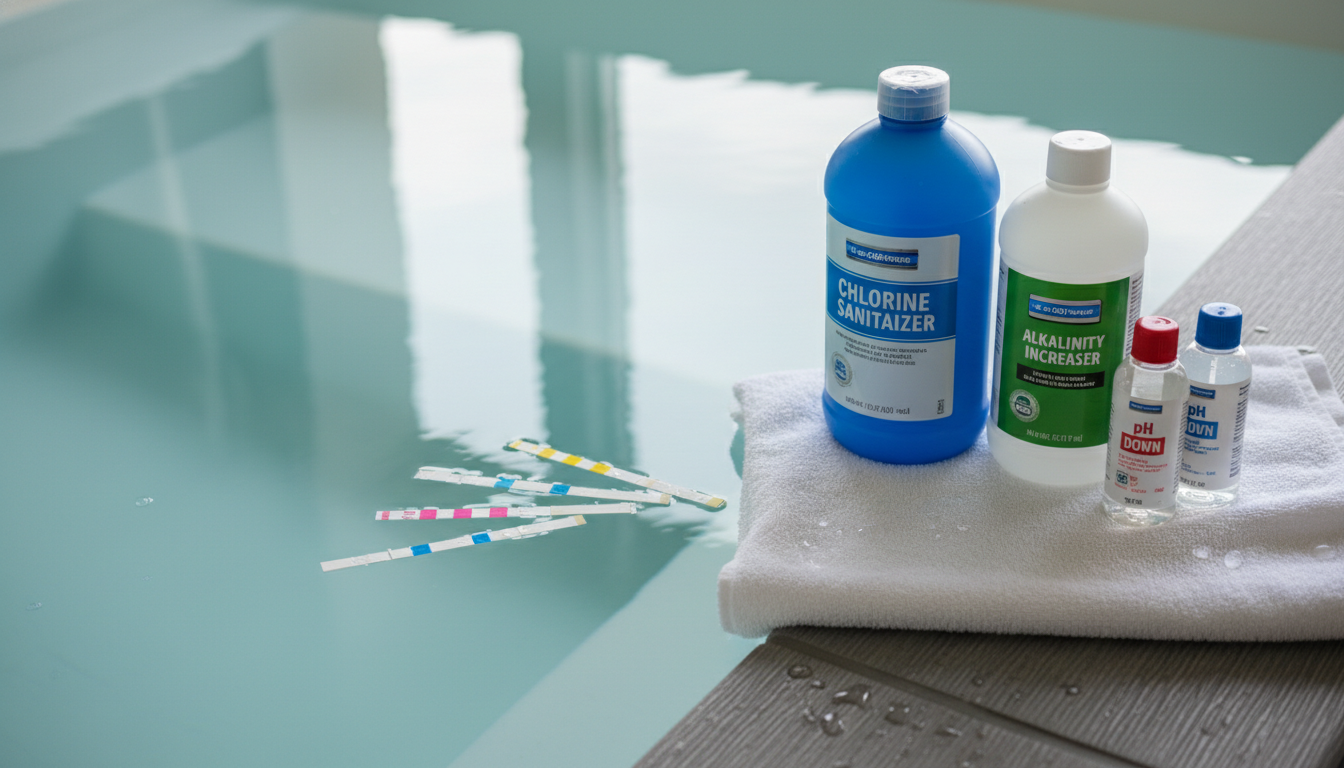
The Correct Sequence for a Fresh Fill
Starting with fresh water is the easiest case. Work through this order, waiting at least 30 minutes between each step with jets running:
- Total Alkalinity (TA) — Target 80–120 ppm. TA is the buffer that stabilizes pH. Adjust it first so your subsequent pH adjustments actually hold. Use sodium bicarbonate (baking soda) to raise it; muriatic acid or sodium bisulfate to lower it.
- pH — Target 7.4–7.6. With TA in range, pH adjustments are predictable. Use pH Up (sodium carbonate) or pH Down (sodium bisulfate). Don’t chase pH before TA is set or you’ll be adjusting in circles.
- Calcium Hardness — Target 150–250 ppm for acrylic shells. Low calcium is corrosive to equipment; high calcium causes scale. Use calcium chloride to raise it. Lower levels require dilution.
- Sanitizer — Add your chlorine (trichlor tabs, dichlor granules) or bromine after water balance is established. If you’re using a bromine system, you’ll want to establish a bromine bank first with sodium bromide, then activate it with an oxidizer.
- Shock — Non-chlorine shock (MPS, like Leisure Time Renew) or a chlorine shock can be added after sanitizer is in range. This oxidizes organic contaminants and activates bromine. Wait 20–30 minutes before re-entry.
- Specialty additives — Enzymes (like Natural Chemistry Spa Perfect), metal sequestrants, or clarifiers go in last. They don’t interact well with fresh shock, so give oxidizers time to dissipate first.
Routine Weekly Maintenance Order
For an established tub you’re maintaining weekly, the sequence simplifies:
- Test first. Use a reliable test kit — the Taylor K-2106 or a good strip like AquaChek Select. Know what you’re adjusting before you touch anything.
- Adjust TA if needed. If it’s drifted outside 80–120 ppm, correct it first.
- Adjust pH. Should be fast if TA is in range.
- Add sanitizer to top off residual levels (1–3 ppm for chlorine, 3–5 ppm for bromine).
- Shock weekly — even if the water looks clear. Bather load, sunscreen, and body oils accumulate and eventually overwhelm your sanitizer if you don’t oxidize regularly.
- Add enzymes or clarifier if using them, at the end.
One Common Mistake: Shocking Too Early
The most frequent sequencing error is adding shock immediately after filling or right after sanitizer, without checking pH. Shock — especially chlorine-based shock — is most effective between pH 7.2 and 7.6. Outside that window, you’re wasting product.
The second most common mistake is adding multiple chemicals at the same time, directly into the water near each other. Even if the order is right, dumping everything in at once can cause localized reactions. Add each chemical separately, in different parts of the tub, with jets running.
Draining and Refilling: Don’t Skip the Purge
Before a full drain — recommended every 3–4 months depending on use — run a plumbing purge with a product like Ahh-Some or Swirl Away. This flushes biofilm from the pipes. If you skip the purge, you’re filling fresh water into contaminated lines and starting behind.
After refilling, go through the full fresh-fill sequence above. Don’t assume your old chemical levels give you a head start — you’re starting from zero.
What to Do When Water Goes Wrong
Cloudy water after adding chemicals usually points to either a pH/alkalinity problem or adding calcium too close to an alkalinity adjustment. The fix is to test thoroughly, let the water circulate, and address balance before adding more sanitizer or shock.
Persistent foam often means dissolved organics are overwhelming your sanitizer — a sign you need to shock more aggressively or drain if the tub’s total dissolved solids (TDS) are too high (generally above 1,500 ppm above your fill water baseline).
Bottom line: Balance alkalinity, then pH, then calcium, then sanitize, then shock, then specialty products. Test before every chemical addition. That sequence isn’t arbitrary — it’s the path of least chemical interference, and following it consistently will save you time, money, and cloudy water headaches.